Turnboards instruction manual
How It Works
Use this guide to set up Turnboards, switch between personal and work organizations, choose a board, and run your day from the Work screen.
Before you begin
- Download Turnboards and sign in or create an account.
- Know which organization you want to use: personal, work, client, side project, or another invited organization.
- Create at least one board for the project, job site, route, department, or goal you want to organize.
- You can keep working without a signal. Turnboards stores changes locally and syncs queued updates when the app can reconnect.
Part 1
Choose your organization.
Turnboards supports multiple organizations and multiple signed-in emails at the same time. You can keep personal work, company work, and invited organizations separate without signing out and back in.
Open the Menu tab.
The bottom navigation has Menu, Work, and Boards. Start with Menu when you need account or organization options.
Tap Organizations.
The Organizations screen shows every organization available on the device.
Pick the right email group.
Organizations are grouped by email, so your personal account, work account, and other signed-in accounts stay easy to tell apart.
Select the organization.
Tap the circle beside an organization to make it active. Boards and Work now show the selected organization's data.
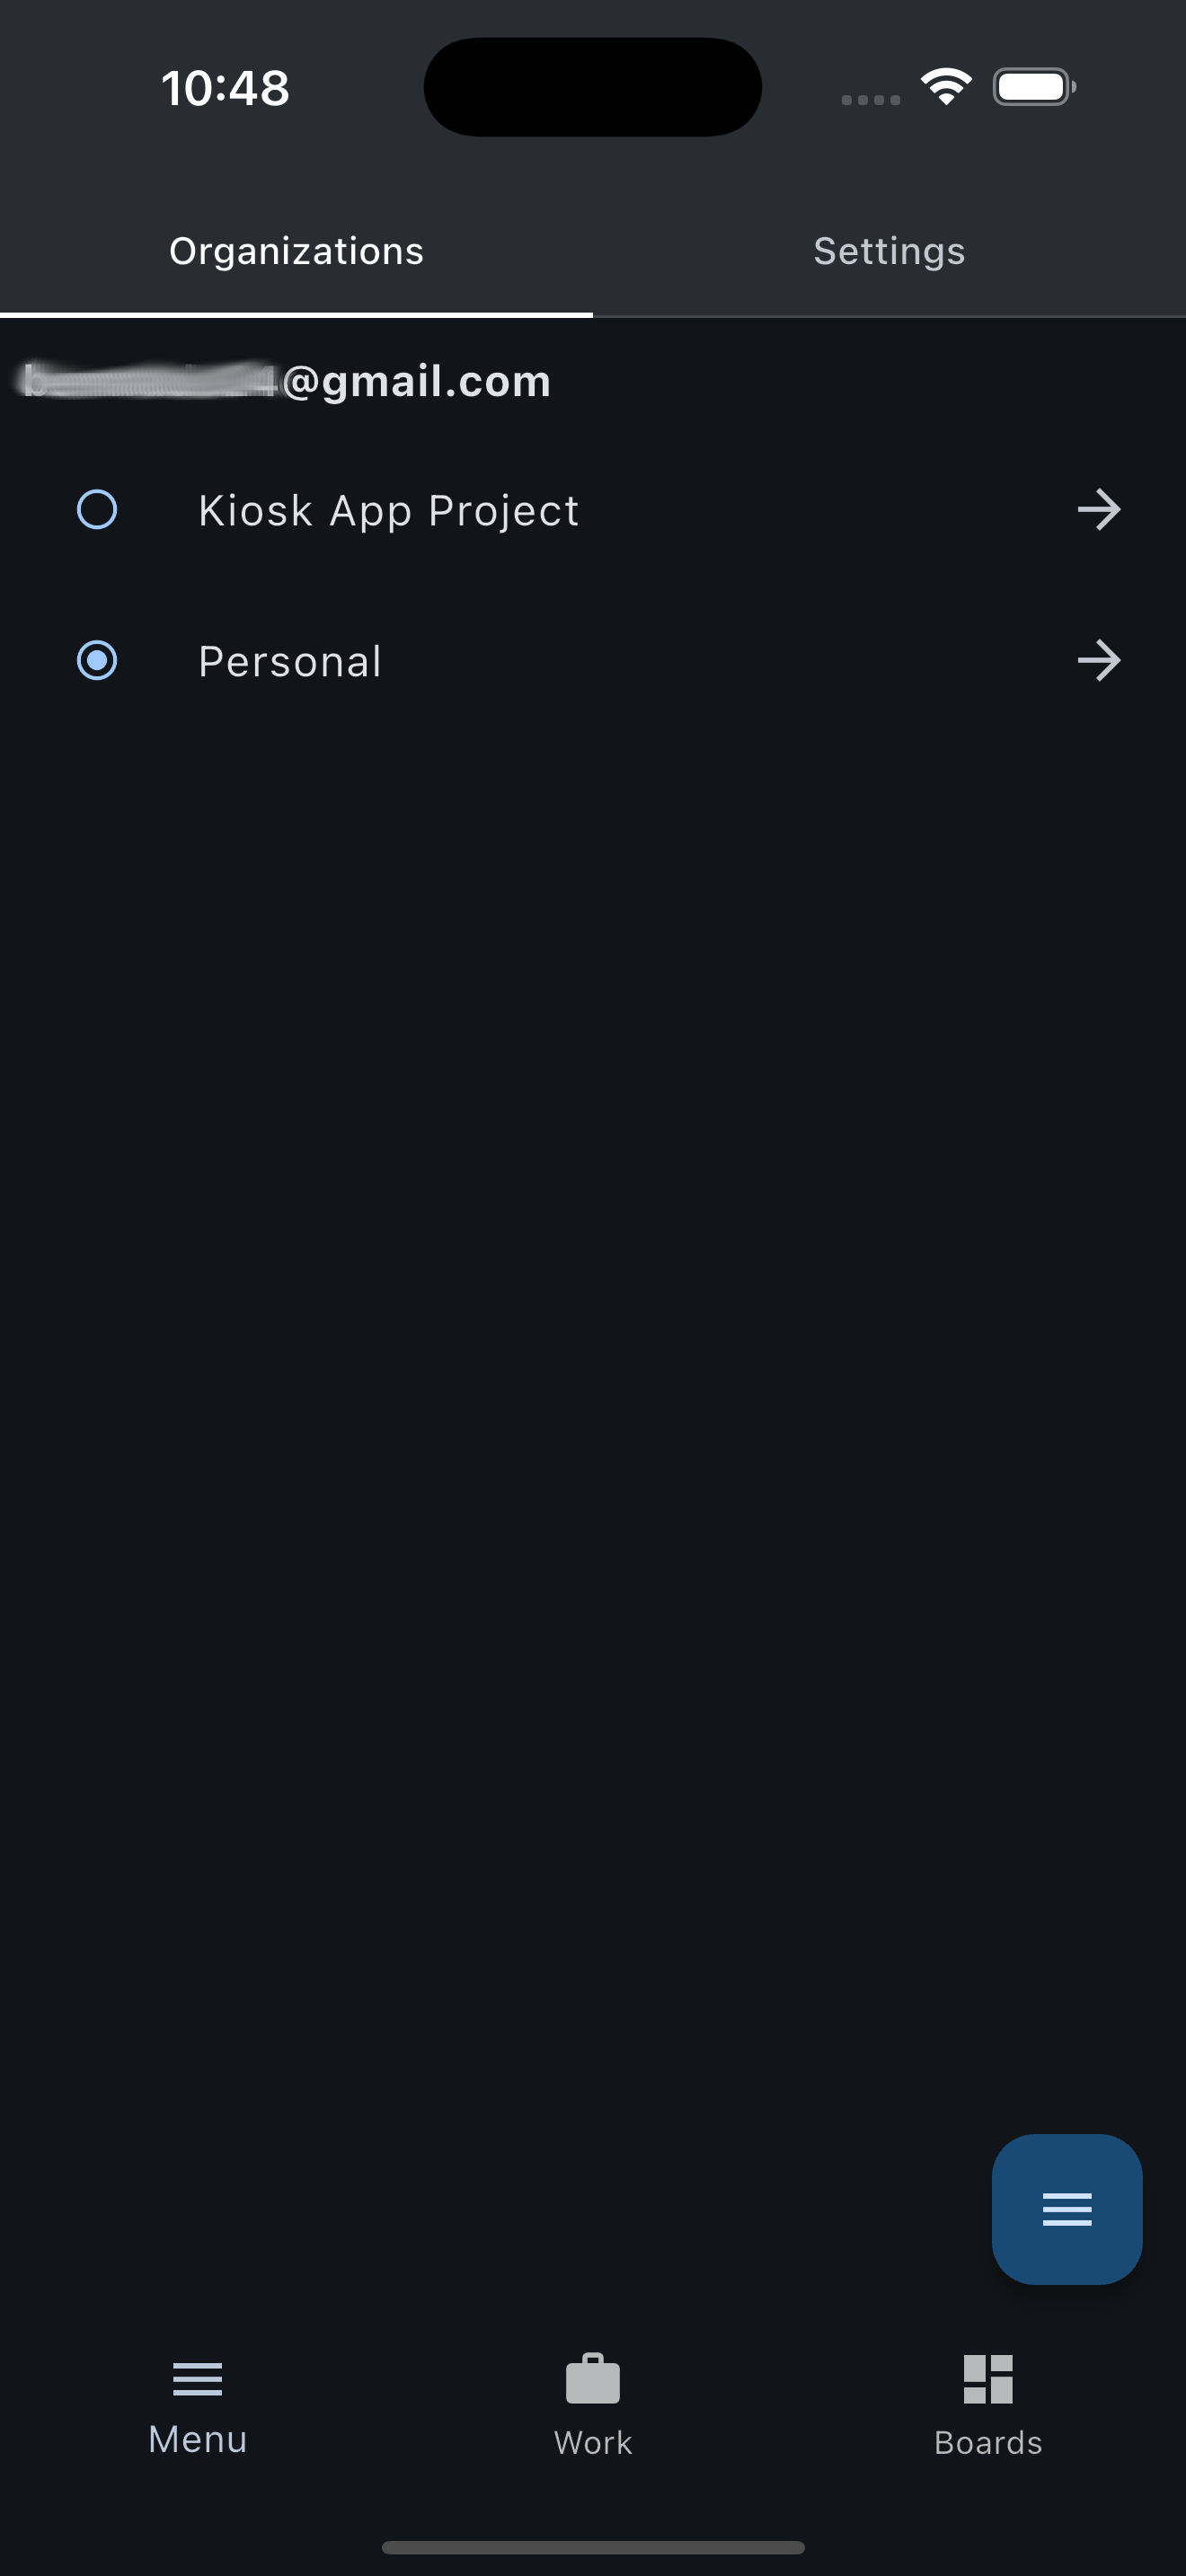
Organizations grouped by signed-in email
Part 2
Choose or create a board.
Boards are containers for related work. Make a board for a job, project, customer, route, department, home goal, or anything else that deserves its own list.
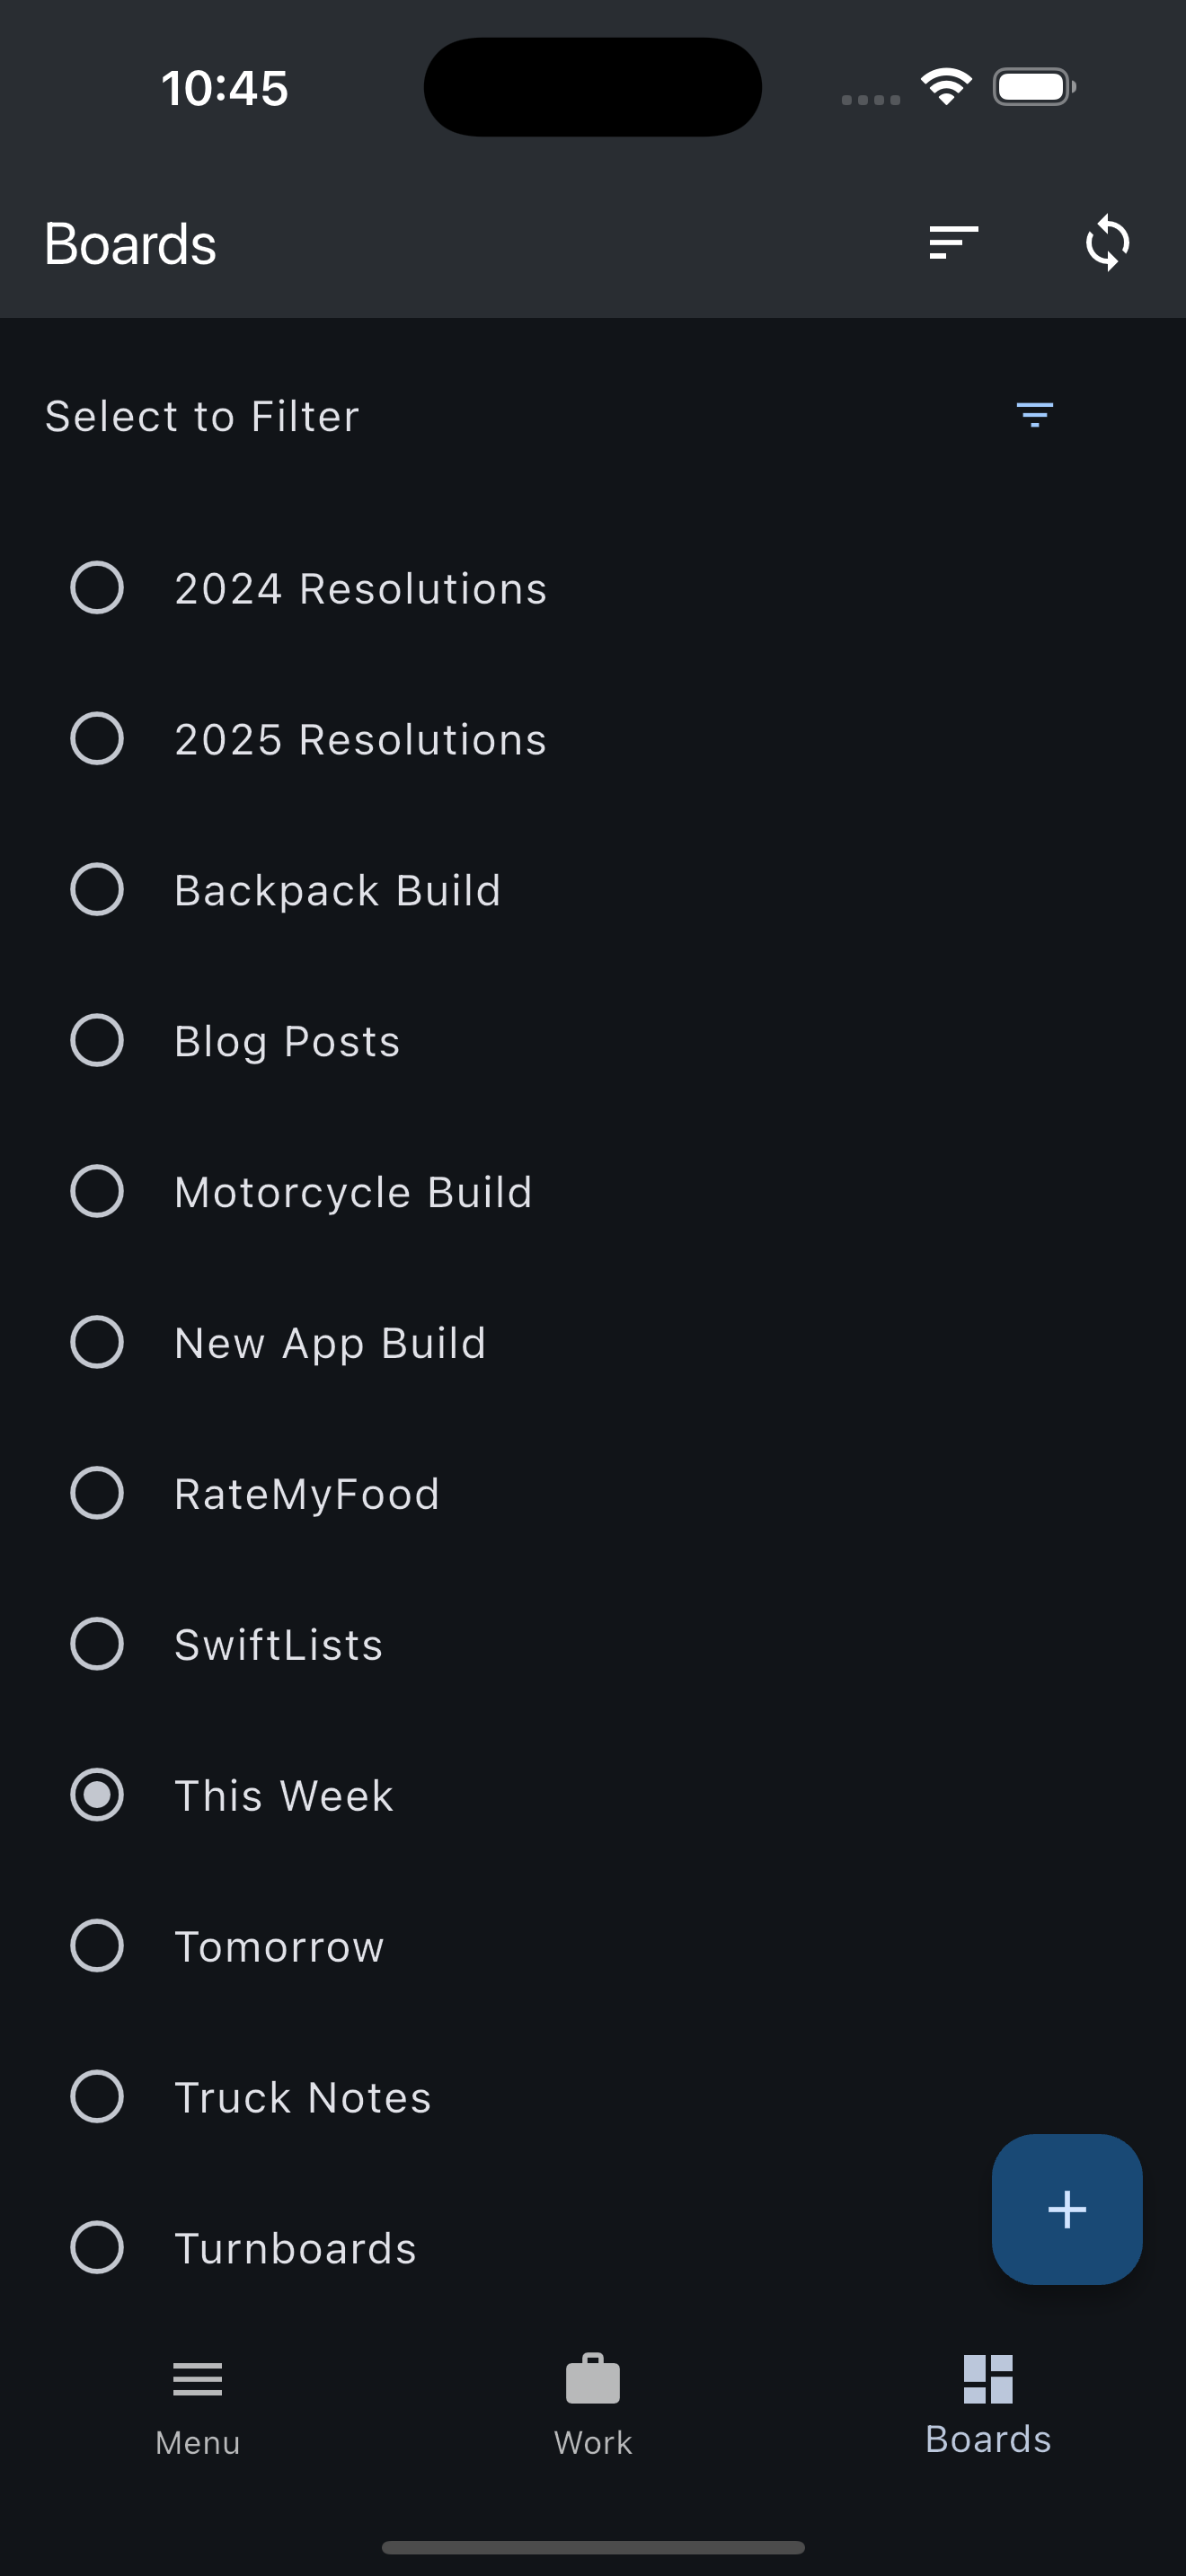
Boards keep each project or job separate
Open the Boards tab.
The Boards tab shows boards for the organization you selected in Part 1.
Tap a board to select it.
Selecting a board takes you back to the Work screen so you can start entering and moving items.
Long-press to edit.
Use a long press when you need to change the board or manage who is assigned to it.
Filter when needed.
Tap the filter icon to see boards assigned to one person instead of every board in the organization.
Part 3
Add work items fast.
The Work screen is the main Turnboards workspace. It is designed for quick entry, quick status changes, and fewer taps than heavier small business task apps.
Open the Work tab.
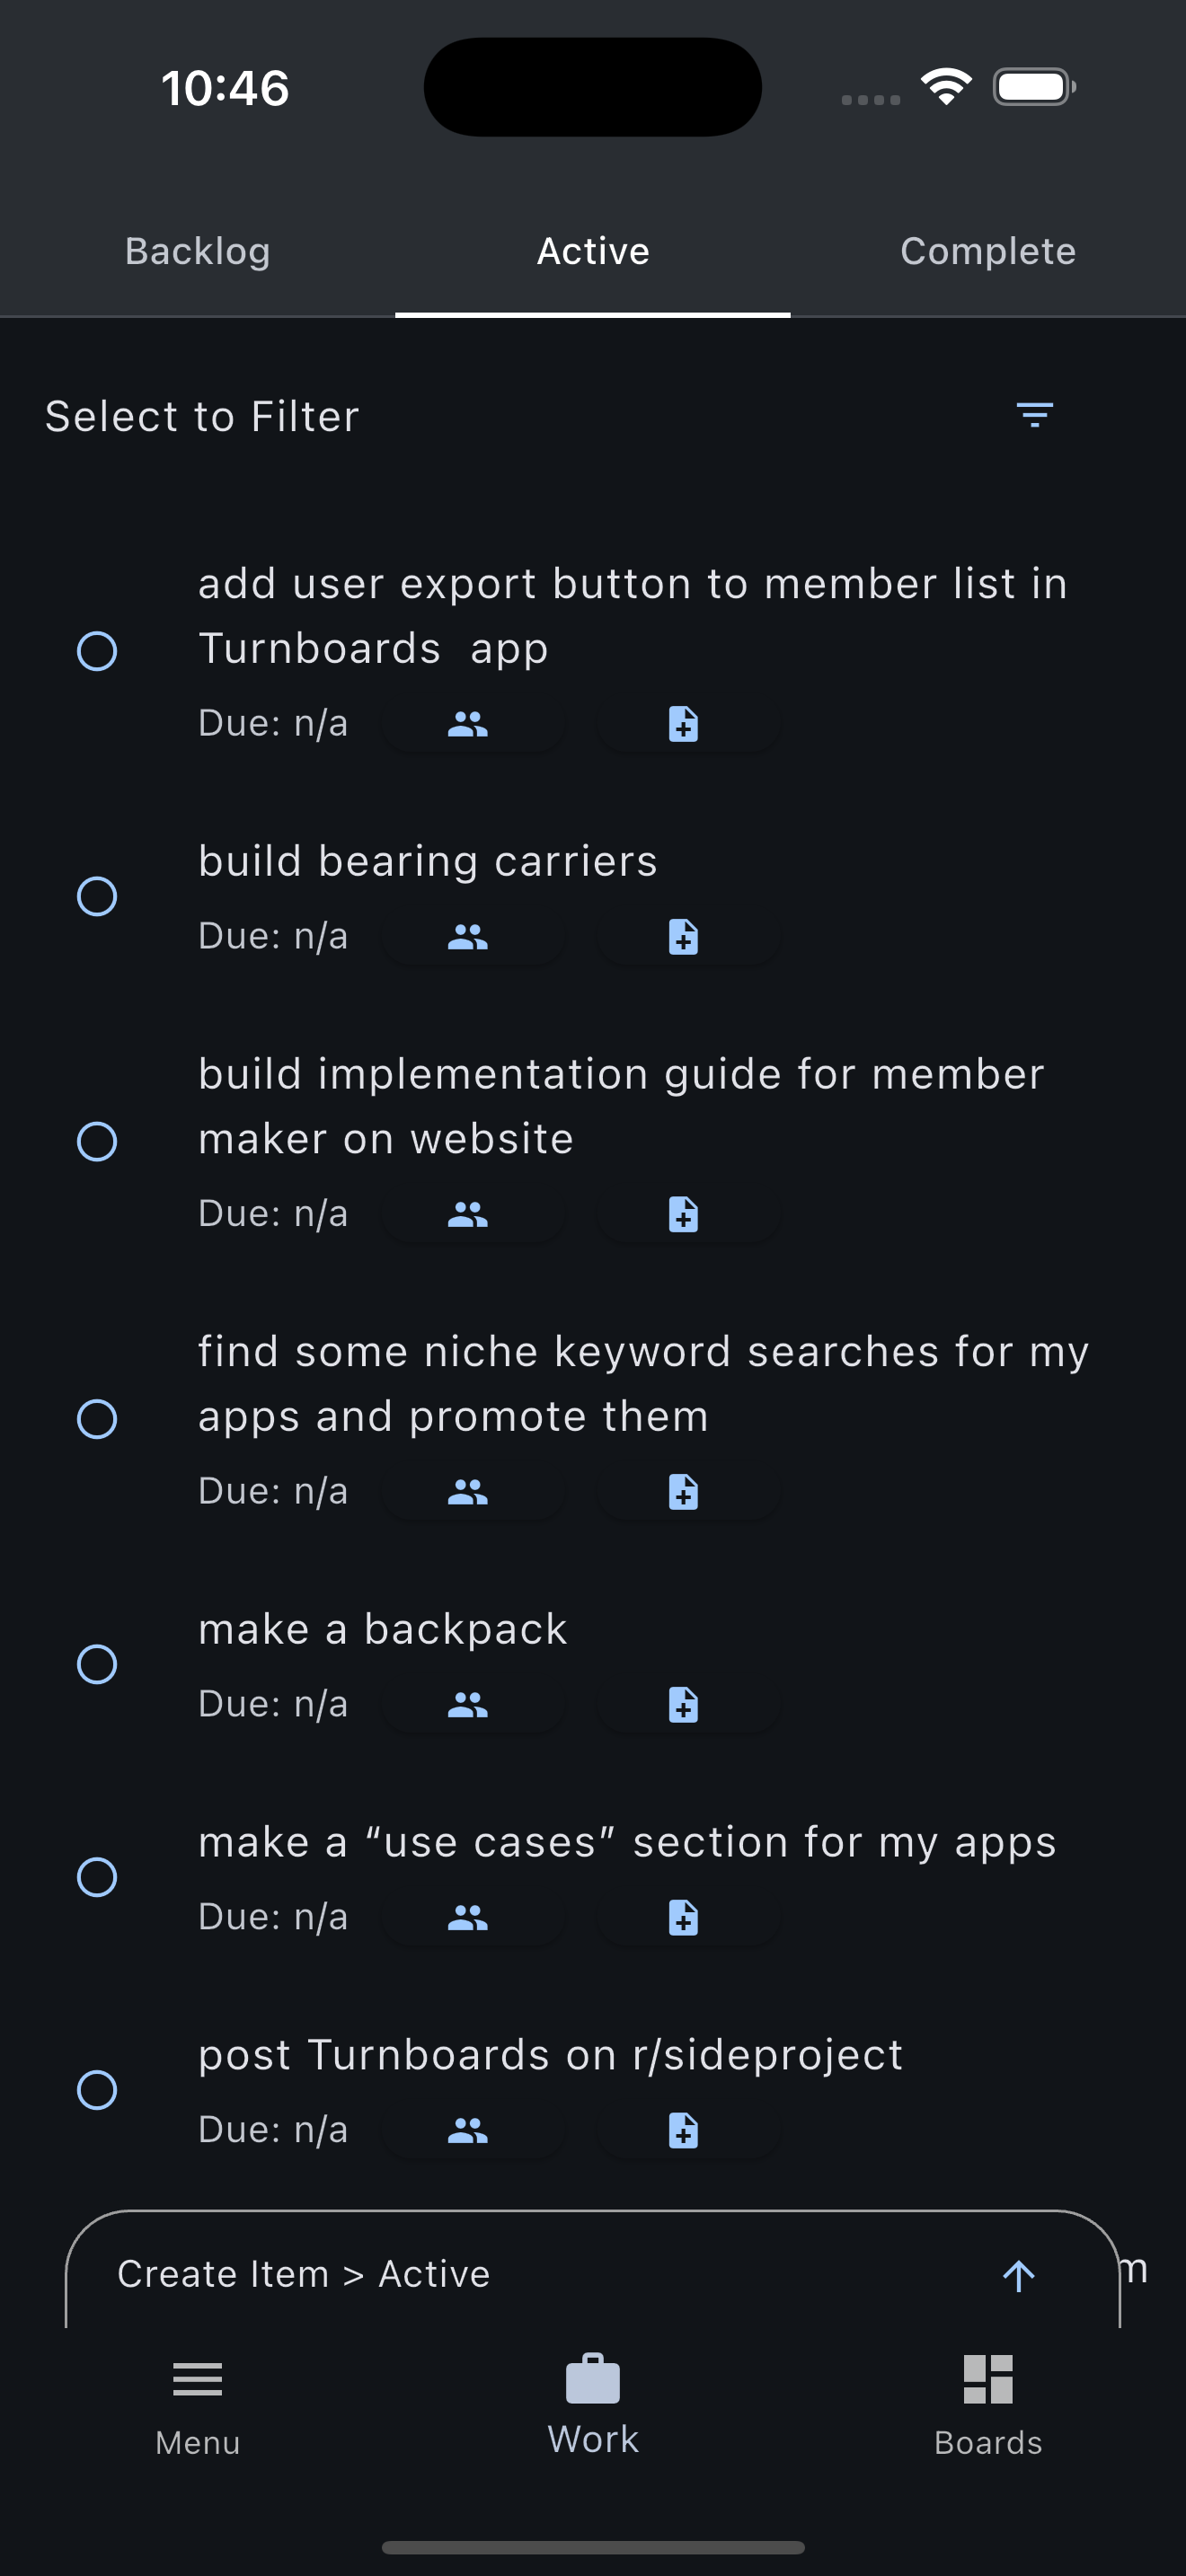
Work is split into three simple tabs: Backlog, Active, and Complete.
Choose the right status tab.
New items go into the tab you are viewing, so add future work to Backlog, today's work to Active, or finished work to Complete.
Type into the action panel.
Open the panel, enter the item, and keep the wording as short or detailed as the job needs.
Add optional details.
Set a due date or tap the people button when the item should be assigned to specific team members.
Tap Save and keep going.
The panel clears after saving so you can enter the next item without leaving the Work screen.
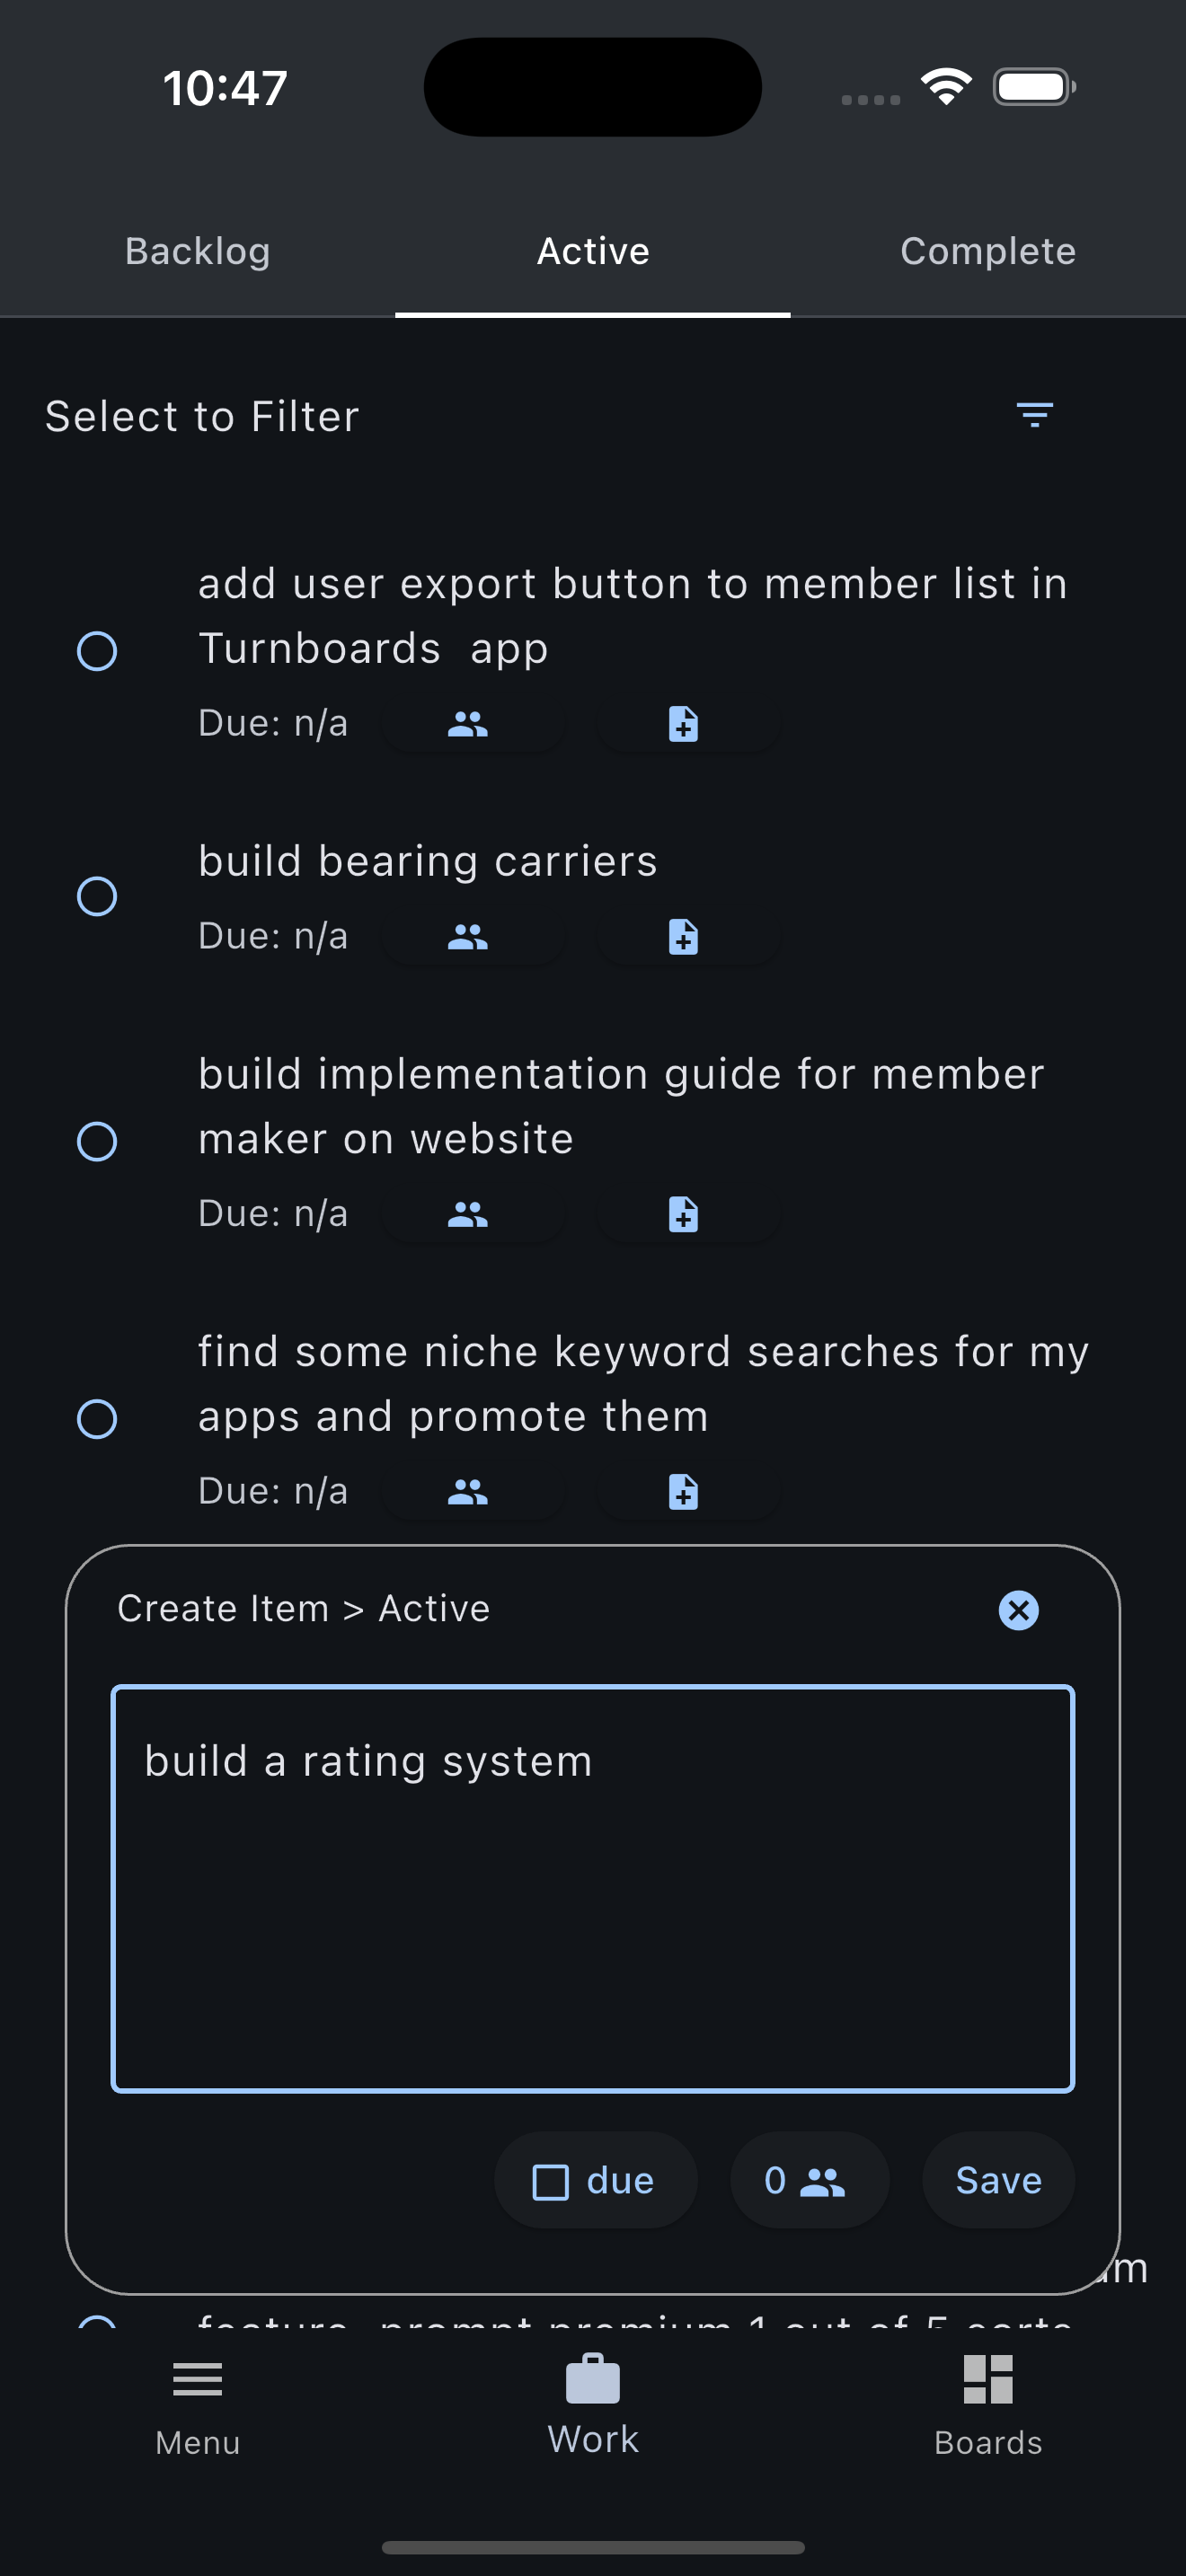
The action panel keeps item entry fast
Part 4
Move work through the day.
Backlog, Active, and Complete keep the app easy to scan in the field, at a counter, in a shop, or anywhere a small team needs a quick answer.
Backlog, Active, and Complete
Put future work in Backlog.
Backlog is for work you need to remember but are not doing right now.
Move today's work to Active.
Active is for work happening now, next, or soon enough that the team needs it visible.
Mark finished work Complete.
Tap the status icon on an item to move it forward.
Long-press for more actions.
Long-press an item when you need to edit it, move it differently, or open more controls.
Part 5
Assign people and add notes.
Turnboards stays simple for one person, but it also supports team work when an organization has multiple users.
Assign boards.
Assign people when creating or editing a board so they can focus on the projects that matter to them.
Assign individual items.
Use the people button in the action panel or item controls to assign a task to specific team members.
Filter to one person.
Use filters on Boards or Work when someone only wants to see their own assignments.
Add task notes.
Use notes for gate codes, measurements, customer details, status updates, follow-up thoughts, or anything that should stay attached to the task.
Assign people without complicating the list
What the Work screen is best at
- Creating items one after another without leaving the page.
- Moving work through Backlog, Active, and Complete with a tap.
- Keeping assignments visible without forcing every task into a heavy workflow.
- Saving useful notes where the work actually lives.
- Working offline when the job site, shop, or route has bad service.
After setup
Run the day from the Work screen.
Start in Menu only when you need to switch organizations. Choose a board from Boards. Then spend the rest of the day in Work adding items, moving tasks forward, checking assignments, and adding notes.
Get Turnboards free

